storm damage
Filing a Roof Insurance Claim After a Storm: A Step-by-St...
From first notice of loss to settlement check — a homeowner's walkthrough of the storm damage roof insurance claim process, with the steps most claimants miss.
Home › Resources › Storm Damage Roof Repair
Filing a Roof Insurance Claim After a Storm: A Step-by-Step Guide
Storm damage to your roof creates a compressed timeline. You have days, not weeks, to initiate the insurance claim process. The difference between filing immediately and waiting ten days can determine whether your insurer covers the full scope of damage or denies supplemental claims outright. This guide walks you through the six critical steps that separate successful claims from denied or underpaid ones.
Step 1: Document Before You Do Anything Else
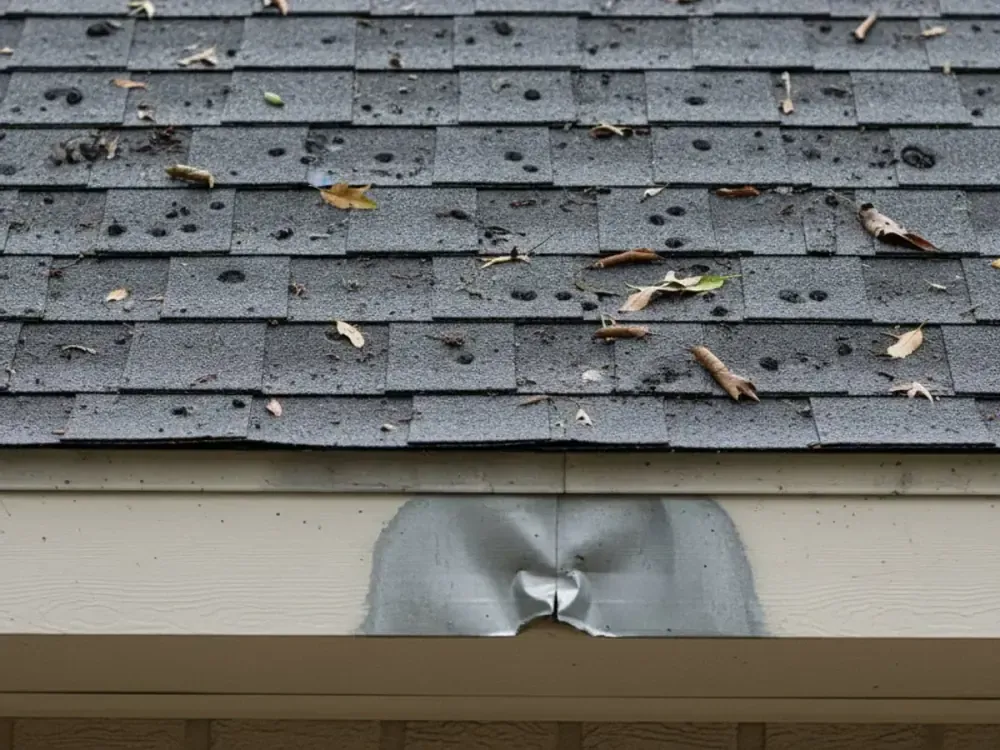
Documentation is your evidentiary foundation. Before contacting your insurance company, photograph and video-record every visible damage point on your roof and property. This includes:
-
Wide-angle shots of the entire roof from ground level
-
Close-ups of individual damaged shingles, flashing, gutters, and vents
-
Damage to adjacent structures (fences, sheds, HVAC units)
-
Interior water stains, ceiling damage, or other secondary effects
-
Downed branches, debris, or hail accumulation if still visible
Timestamp your photos. Most smartphones embed metadata; if yours doesn’t, write the date and time on a notepad and photograph it alongside the damage. This prevents insurers from claiming damage occurred before the storm event.
If you have how to identify hail damage concerns specifically, document the impact patterns and any dents in metal components. Hail damage claims are frequently undervalued because adjusters misidentify impact severity or conflate weathering with storm damage.
Save all receipts, invoices, and proof of purchase for roof components if you’ve performed recent maintenance or upgrades. Age and condition of materials directly affect replacement value calculations.
Critical timing note: Do not enter your attic or climb onto the roof yourself. You risk personal injury and may inadvertently disturb evidence that supports your claim. Wait for a professional assessment.
Step 2: File the Claim — Within the Policy Window
Contact your insurance agent or insurer’s claims department within 24 to 48 hours of the storm. Most homeowners policies require notice within a specific timeframe—often 30 to 60 days, but some carriers impose stricter windows [Representative stat — not yet sourced]. Filing early establishes the claim date, which becomes the reference point for all subsequent valuations.
-
The date and time the storm occurred
-
A description of the damage (hail, wind, falling debris, water intrusion)
-
Your contact information and preferred inspection appointment window
Request written confirmation of your claim number via email or mail. Do not rely on verbal confirmation alone. Your claim number is the identifier for all future correspondence.
Ask the claims representative three specific questions:
-
What is the deductible amount for wind and hail damage?
-
What is the typical adjuster response time in your area?
-
Does the policy cover the cost of temporary repairs (tarping, water mitigation)?
If temporary repairs are needed to prevent secondary water damage, photograph the interim condition and obtain written estimates for that work. Some insurers will reimburse temporary mitigation costs; others will not. Knowing your policy’s stance before you spend money prevents disputes later.
Step 3: Get Your Contractor’s Report Before the Adjuster Visits
This step is where most homeowners lose leverage. Schedule a professional roof inspection with a licensed contractor—ideally one experienced in storm damage roof repair—before the insurance adjuster arrives. This is not redundant. It is essential.
A qualified contractor provides a detailed damage assessment that includes:
-
Photographic documentation with measurements and location references
-
Identification of damage type (wind uplift, hail impact, debris strike)
-
Assessment of underlying structural or water damage
-
Itemized repair or replacement costs based on current material pricing
-
Notation of any pre-existing damage or maintenance issues
This report serves as your independent baseline. Insurance adjusters work for the insurance company, not you. Their role is to verify the claim is valid, but not necessarily to identify every damage point. A contractor’s detailed report flags issues an adjuster might overlook or undervalue, and it provides documentation to support supplemental claims later.
Obtain the contractor’s report in writing. Digital copies with photos are standard. Do not share this report with the adjuster unprompted—keep it for your records until the adjuster’s inspection is complete. You will use it to identify discrepancies.
Step 4: The Adjuster Inspection
The adjuster will contact you to schedule an inspection. Be present during this inspection. Do not allow it to occur without you on-site.
Before the adjuster arrives, walk the roof perimeter yourself (from ground level, not climbing) and note any obvious damage. During the inspection:
-
Follow the adjuster onto the roof if permitted, or observe from a safe vantage point
-
Ask the adjuster to explain their assessment of each damage area
-
Take photos of the adjuster’s inspection process and any notes they write
-
Request a copy of the adjuster’s report or photos before they leave
-
Note any areas the adjuster does not inspect or dismisses without detailed examination
Do not argue with the adjuster during the inspection. Record their findings and statements. Disputes are resolved through supplemental claims and negotiation, not confrontation on-site.
If the adjuster’s findings differ significantly from your contractor’s assessment, note the specific discrepancies. These become the basis for a supplemental claim filing.
Step 5: The Estimate and the Gap
The adjuster will issue an estimate within 5 to 10 business days. This estimate becomes your initial insurance authorization for repairs. Review it carefully against your contractor’s report and your own documentation.
Common gaps between the adjuster’s estimate and actual repair costs include:
Ready to Talk to an Expert?
Pro Exteriors serves commercial and residential clients across Texas, Colorado, Kansas, and Missouri.
Hail Damage: How to Identify It
Working with Adjusters After a Storm
Wind Damage vs. Hail Damage
For the service page this article supports, see storm damage roof repair.
Related reading: /blog/hail-damage-how-to-identify/ and /blog/emergency-tarping-costs/.