commercial roofing
Flat Roof Repair Methods Explained: TPO, EPDM, Modified B...
Not all flat roof repairs are the same. A material-by-material breakdown of the correct repair technique for each commercial membrane system.
Flat Roof Repair Methods Explained: TPO, EPDM, Modified Bitumen, and Built-Up Systems
The phrase “flat roof repair” covers four entirely different sets of materials and techniques. A TPO repair requires heat-welding equipment and factory-matched membrane material. An EPDM repair requires contact adhesive and seam tape with specific primer chemistry. Using the wrong approach doesn’t just fail to fix the problem — it can create new adhesion failures in adjacent areas and void manufacturer warranty coverage on the surrounding membrane.
This is the material-by-material guide that should be in the hands of every facility manager before a repair contractor arrives. Know your system. Know what correct technique looks like. The difference between a $600 repair that holds for a decade and a $600 repair that fails in the first rainstorm is almost always the method.
TPO Membrane: Heat-Weld vs. Lap-Seal Repairs
Thermoplastic Polyolefin (TPO) is currently the most widely installed commercial membrane in North America, accounting for roughly 40% of all new commercial roofing installations. Its defining characteristic — and its repair requirement — is the heat-welded seam. TPO is a thermoplastic material, meaning it can be re-melted and fused using a hot-air welding tool. This is also the reason it cannot be repaired with simple adhesive: contact cements and lap sealants do not create a bond equivalent to a heat-weld, and any adhesive-only repair on a TPO membrane should be considered a temporary measure, not a permanent fix.
Field membrane punctures and tears: The correct repair involves cleaning the damaged area, cutting a TPO patch from material compatible with the installed membrane (same thickness, same manufacturer where possible), and heat-welding all four edges of the patch to the existing membrane with minimum 2-inch overlap on all sides. The weld must be tested with a probe tool for continuous fusion — a gap in the weld line is an immediate failure point.
Seam separation: Failed seam welds require cleaning, possible primer application, and re-welding. Where a seam has separated due to membrane shrinkage pulling the termination bar, the termination bar must be repositioned and refastened before a new weld is applied — simply welding over a separated seam without addressing the root tension will fail again within one thermal cycle.
“We see a lot of ‘repairs’ on TPO roofs that are just lap sealant spread over a failed seam. It looks fixed for about three months until the first hot summer day flexes the membrane and the sealant pops off the surface. TPO wants heat. If a crew shows up without a hot-air welder, they cannot properly repair a TPO roof.”
EPDM: Patch Bonding and Seam Re-Adhesion
Ethylene Propylene Diene Monomer (EPDM) is a thermoset rubber membrane — it cannot be re-melted and fused like TPO. EPDM repairs rely on adhesive bonding with compatible contact cement or EPDM seam tape systems. The chemistry of EPDM adhesive systems is specific: using the wrong primer or adhesive on EPDM results in poor bonding that fails rapidly under UV and thermal cycling.
Puncture and tear repairs: The area is cleaned with EPDM-compatible splice wash, primed, and patched with uncured EPDM or pre-manufactured EPDM repair patches. Patch overlap must be minimum 3 inches on all edges. The patch and the repair area are both coated with EPDM contact cement, allowed to tack dry, then brought together and firmly rolled with a hand roller to ensure full contact bonding without air pockets.
Seam re-adhesion: Failed EPDM seams are cleaned, re-primed, and either re-bonded with fresh adhesive or covered with EPDM seam tape (a factory-manufactured tape with peel-and-stick adhesive specifically engineered for EPDM seam repair). Seam tape is the faster and more consistent repair method for seam failures; it is less skill-dependent than a hand-applied adhesive seam and produces more predictable results.
Flashing repairs on EPDM systems: Uncured EPDM is used for flashing details because it conforms to complex geometries — inside corners, pipe wraps, curb edges. Cured patch material cannot be manipulated the same way. A contractor who uses cured patches for flashing work is indicating limited familiarity with EPDM repair protocols.
Modified Bitumen: Torch-Down Repair Process
Modified bitumen roofing comes in two primary types: SBS (styrene-butadiene-styrene) and APP (atactic polypropylene). Both are multi-ply systems — typically a base sheet and a cap sheet — installed using torch application, hot mopping, or cold adhesive depending on the specific product. Repair technique varies by application method and by which layer has failed.
Torch-down cap sheet repair: A pre-fabricated modified bitumen patch is cut to overlap the damaged area by at least 4 inches on all sides. The underside of the patch and the surrounding field membrane are heated with a propane torch until the material becomes tacky and flowable, then the patch is pressed firmly into the softened substrate and rolled. The edges of the patch are torched again to seal the overlap and prevent edge lift.
Cold-process modified bitumen repair: Some SBS membranes are installed with cold adhesive. Repair patches on these systems use compatible cold-applied adhesive rather than torching. Mixing repair methods — torching a membrane installed with cold adhesive — can cause blistering and delamination at the repair boundary.
Blister repair: Blisters in modified bitumen are pockets of trapped moisture or air between plies. The correct repair is to cut the blister open in an X-pattern, allow it to dry completely, re-adhere the flaps with bituminous adhesive, and apply a patch over the repair area. Blisters should never simply be punctured without full re-adhesion — a punctured blister that is not sealed becomes a water infiltration point.
Built-Up Roofing: Flood Coat and Aggregate Patching
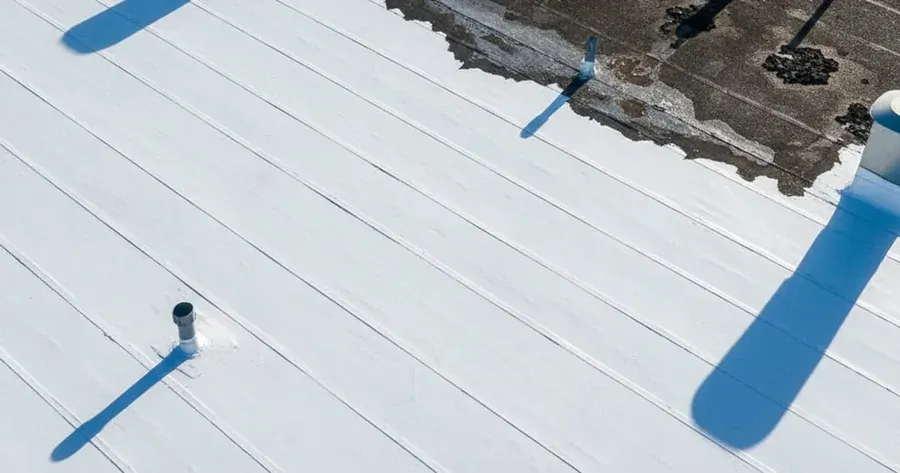
Built-up roofing (BUR) is an older system consisting of multiple alternating layers of bitumen and reinforcing felts, typically topped with aggregate (gravel or slag) embedded in a flood coat of hot asphalt. Most BUR systems still in service are 20–40 years old and are past their original warranty period. Repairs on BUR systems prioritize watertightness and extended service life rather than warranty compliance.
Localized repair: The damaged area is cleaned of loose aggregate and debris. Hot asphalt is mopped into the damaged zone, followed by a layer of reinforcing felt pressed into the hot bitumen, followed by a second mop coat and re-aggregate. For larger repair areas, multiple ply layers may be added to bring the repair section to the same thickness as the surrounding field membrane.
Alligatoring repair: Surface alligatoring — the cracked, patterned degradation of the top asphalt layer — indicates oxidation and can be treated with a flood coat and aggregate application if the underlying plies are still structurally sound. If the alligatoring has progressed through all plies to the deck, repair is not viable and section or full replacement is required.
When Spot Repairs Won’t Hold
The indicators that spot repair has reached its limit are consistent across all membrane systems:
-
More than 25% of the roof surface has been repaired in the last five years — at this threshold, the system is failing systemically, not locally
-
Core samples show insulation saturation exceeding 25% by area — wet insulation promotes deck corrosion and creates conditions where new repair areas fail faster than dry sections
-
The same location has been repaired more than twice — repeated failure at the same point indicates structural movement, deck flex, or membrane tension that surface repairs cannot address
-
Repairs are failing within 12 months of installation — correctly executed repairs on a viable system should last 5–10 years minimum; rapid failure indicates the field membrane condition is incompatible with holding a repair
For commercial roof repair on any system type, the correct diagnosis requires understanding whether the failure is local or systemic before a repair scope is written. A contractor who writes a repair scope without examining insulation condition and the full failure history is guessing — and property owners pay for those guesses.
Choosing a Contractor for Your System
System-specific expertise is not optional on commercial flat roof repair. The questions to ask any contractor before authorizing work:
-
Which manufacturer’s systems are you certified to repair? Can you show the certification documentation?
-
Will this repair maintain my existing warranty, and what documentation will you provide to submit to the manufacturer?
-
What equipment are you bringing to this repair? (If a TPO repair quote doesn’t mention a hot-air welder, ask why.)
-
Are you using manufacturer-supplied patch material or third-party material? (Third-party material almost always voids manufacturer warranty coverage.)
A contractor who can answer these questions specifically and confidently is demonstrating genuine system knowledge. One who hedges, deflects, or gives generic answers about “roofing repairs” without system specificity is a risk to both the repair outcome and the warranty you are paying to protect. See our emergency commercial roof leak response guide for what to do when a repair is needed immediately and contractor vetting time is limited.
Talk to a Flat Roof Specialist
Pro Exteriors technicians are manufacturer-certified on TPO, EPDM, modified bitumen, and BUR systems — and carry the right equipment for every repair on every truck.
Emergency Commercial Roof Leak Response
7 Common Causes of Commercial Roof Damage
Roof Repair vs. Replacement Decision Guide
For the service page this article supports, see commercial roofing contractor.
Related reading: /blog/how-insurance-claims-work-roof-repair/ and /blog/extending-roof-lifespan/.